Construction technology and process of PVC floor
First, floor detection method
1. Use a temperature and hygrometer to detect the temperature and humidity. The indoor temperature and the surface temperature are preferably 15°C, and construction should not be below 5°C and above 30°C. The relative air humidity suitable for construction should be between 20% and 75%.
2. Use a moisture content tester to detect the moisture content of the base layer, and the moisture content of the base layer should be less than 3%.
3. The strength of the base layer should not be lower than the requirement of concrete strength C-20, otherwise suitable self-leveling should be used to strengthen the strength.
4. The result of testing with a hardness tester should be that the surface hardness of the base layer is not less than 1.2 MPa.
5. For the construction of PVC floor materials, the unevenness of the base layer should be less than 2 mm in the range of a 2-meter ruler, otherwise suitable self-leveling should be used for leveling.
6. The surface before the self-leveling trial work should be flat, dry, firm, free of dust and dirt. If the tile floor is hollow, the floor with the hollow layer should be kicked off. Refinish the ground.
Sencond, floor pretreatment
1. Use a floor grinder of more than 1000 watts with appropriate grinding discs to polish the floor as a whole, remove paint, glue and other residues, raised and loose plots, and empty plots must also be removed.
2. Vacuum and clean the floor with an industrial vacuum cleaner of not less than 2000 watts.
3. For cracks on the floor, stainless steel reinforcing bars and polyurethane waterproof adhesive can be used to repair the surface with quartz sand.
Third, self-leveling construction - primer
1. The absorbing base layer such as concrete and cement mortar leveling layer should be sealed and primed after being diluted with water at a ratio of 1:1 with a multi-purpose interface treatment agent.
2. For non-absorbent base layers such as ceramic tiles, terrazzo, marble, etc., it is recommended to use a dense interface treatment agent for primer.
3. If the moisture content of the base layer is too high (>3%) and it needs to be constructed immediately, epoxy interface treatment agent can be used for primer treatment, but the premise is that the moisture content of the base layer should not be greater than 8%.
4. The construction of the interface treatment agent should be uniform, and there should be no obvious liquid accumulation. After the surface of the interface treatment agent is air-dried, the next self-leveling construction can be carried out.
Fourth, self-leveling construction - mixing
1. Pour a bag of self-leveling cement into a mixing bucket filled with clean water according to the specified water-cement ratio, and stir while pouring.
2. In order to ensure even self-leveling stirring, a high-power, low-speed electric drill with a special stirrer must be used for stirring.
3. Stir until there is a uniform slurry without agglomeration, let it stand and mature for about 3 minutes, and then briefly stir once.
4. The amount of water added should be strictly in accordance with the water-cement ratio (please refer to the corresponding self-leveling instructions). Too little water will affect fluidity. Too much will reduce the strength after curing.
Five, self-leveling construction - laying
1. Pour the stirred self-leveling slurry on the construction floor, it will flow and level the ground by itself. If the design thickness is less than or equal to 3 mm, it needs to be scraped with a special tooth scraper.
2. Then, the construction personnel should wear special spiked shoes, enter the construction ground, and use a special self-leveling air release roller to gently roll on the self-leveling surface to release the air mixed in the stirring to avoid air bubbles and pits and the height difference of the interface.
3. After construction, please close the site immediately, prohibit walking within 5 hours, avoid heavy object impact within 10 hours, and lay the PVC floor after 24 hours.
4. In winter construction, the laying of the floor should be carried out 48 hours after the self-leveling construction.
5. If the self-leveling needs to be finely ground and polished, it should be carried out after the self-leveling is dried.
Sixth, the paving of the floor - pre-laying and cutting
1. Whether it is a coil or a block, it should be placed on site for more than 24 hours to restore the memory of the material and the temperature is consistent with the construction site.
2. When the blocks are laid, the two materials should be close to each other and there should be no joints.
Seventh, floor cleaning and maintenance
1. The PVC series floor is developed and designed for indoor places, and should not be laid and used in outdoor places.
2. Please select the corresponding cleaning agent for regular cleaning and maintenance according to the method recommended by the manufacturer.
3. High-concentration solvents such as toluene, banana water, strong acids and strong alkali solutions should be avoided on the floor surface, and inappropriate tools and sharp scrapers should be avoided or damage the floor surface.
Eighth, related tools
1. Floor treatment: surface humidity tester, surface hardness tester, floor grinder, high-power industrial vacuum cleaner, drum, self-leveling mixer, 30-liter self-leveling mixing bucket, self-leveling tooth scraper, spikes, self-leveling deflate.
2. Floor laying: cutter, two-meter steel ruler, moon cutter, combined scriber.
PVC floor installation and laying process
First, technical preparation
1. Be familiar with and review the floor construction drawings
2. Define the construction content and analyze the characteristics of the project.
3. According to the requirements of the installation ground, make technical disclosure to the operators.
Second, preparation of tools
1. Main tools: roller, knife, slitting knife, scissors, wooden hammer, rubber hammer, etc.
Third, workforce preparation
Because the pvc floor installation project is more professional, a fixed professional team is used for construction and installation. The team members have many years of floor construction experience to ensure 100% construction quality.
Fourth, material preparation
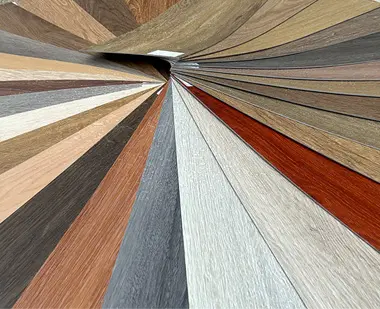
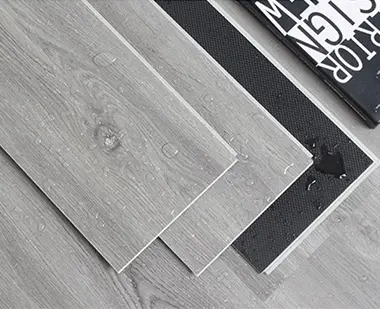
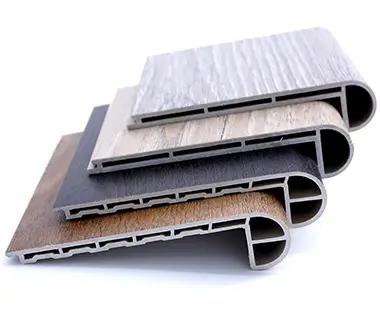
1. The board surface is required to be flat and smooth, without cracks, uniform in color, consistent in thickness, and in line with design requirements and relevant technical standards.
Fifth,working conditions
1. The ceiling, walls, and water, electricity, and pipes are installed.
2. Interior painting, brushing, etc. are completed.
3. The base layer has been completed, no hollowing, cracks and sanding, oil pollution and other phenomena.
4. The indoor temperature is not more than 80%, and the construction environment temperature should not be lower than 10 ℃.
Sixth, construction operation process
Base treatment - self-leveling construction pre-laying - pvc floor installation - cleaning the site.
(1) Primary treatment
1. After the wall, ceiling and doors and windows are installed, clean the ground debris.
2. Remove sand, oil stains, residues, etc. on the surface of the base.
3. Clean up the dust and sand on the ground.
(2) Self-leveling construction
1. Check whether the cement self-leveling meets the relevant technical standards, such as expired self-leveling should not be used.
2. Pour an appropriate amount of self-leveling into the dissolver, and dilute the self-leveling with clean water according to the product instructions.
3. Stir thoroughly until the cement is self-leveling and becomes fluid.
4. Sequentially pour the self-leveling on the construction ground and scrape it with a rake tooth scraper with a thickness of about 2-3mm.
5. Pedestrians and stacking items are not allowed within 4 hours after the self-leveling construction is completed.
(3) Release line
1. According to the design pattern, plastic floor specifications, room size, divide the grid, and locate the elastic line.
2. Pop up the center cross line or diagonal line on the base layer, and pop up the parquet line.
3. The border line pops up on the wall, and the line must be thin and accurate.
4. Before the floor is laid, line dry, pre-assemble and number the boards.
(4) The floor installation
1. Clean the ground and keep the ground clean and tidy (the height difference is within 3MM).
2. Try to install the first floor from the door of the room, with the side with the tongue facing the door, and add a special pad (which should be taken out at the end of the paving) to reserve an expansion joint of 8-12MM.
3. Keep the short side and the ground at an appropriate angle and insert it into the slot, and press it lightly to lock the floor.
4. Measure the required length of the tail end of the first row, reserve an expansion joint of 8-12MM, and saw off the excess part.
5. Use the sawn floor with a length of not less than 300MM as the head of the second row of floors, and the short seam between the two adjacent rows of floors is not less than 300MM.
6. Insert the slot at a proper angle between the long side and the ground, and press it lightly to lock the floor.
7 Together with the adjacent floor, lift it up slightly, push it forward firmly, and lock the lock.
8. The last row is usually narrower than other floors. Use a pencil to mark the distance from the wall to the edge of the bottom floor of the last floor (plus 8-12MM distance from the wall), and saw it off.